Introduction: Understanding the Issue of Vape Pen Blinking
Vape pens often face the frustrating problem of blinking or flashing lights, indicating that something is amiss. This issue can leave you perplexed and disrupt your vaping experience, necessitating a quick and effective resolution.
In this comprehensive guide, we delve into the various reasons behind vape pen blinking issues. We provide step-by-step troubleshooting methods to fix them. Whether it's a low battery, connection issues, or faulty components, you'll find actionable advice here. Empower yourself to take control of your vaping experience by understanding and resolving these common problems.
For those new to vaping, our Beginners Guide to Vaping offers a comprehensive resource. It covers everything you need to know about choosing the right vape and e-liquids to start your vaping journey successfully.
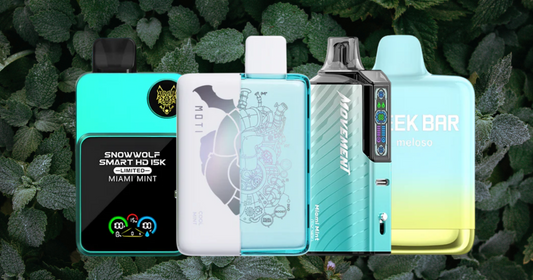
Additionally, if you're considering an upgrade for your device, we have an extensive collection of Vape Pens available. These refillable nicotine smoke vape pens offer the best options on the market.

Part 1: Understanding Vape Pen Blinking Problems
1. Low Battery Power
One of the main reasons why vape pens blink is because of low battery power. When the battery level is too low, the device won't have enough power to heat the e-liquid properly, resulting in blinking lights and no vapor.
How to prevent low battery issues:
To avoid this problem, here are a couple of things you can do:
- Check and Charge Regularly: Make it a habit to check your vape pen's battery level often. Keeping your battery fully charged ensures that it performs consistently and prevents any unexpected blinking problems.
- Inspect Charging Cable and Port: If you're experiencing blinking issues due to low battery, try using a different charging cable or port. Faulty connections can have a big impact on the charging process. Sometimes, even a slight bend in the cable can disrupt proper charging.
Example: Imagine you're about to enjoy a relaxing vaping session after a long day. You press the button on your vape pen, but instead of a satisfying puff of vapor, you see a series of blinking lights. Checking the battery level reveals it's almost drained. Plugging it into your usual charger doesn't seem to work either. Switching to another USB cable solves the problem, and soon your vape pen is back in action.
By taking these simple steps, you can ensure that your vape pen always has enough power to function properly and avoid any frustration caused by low battery issues.
In the next sections, we'll be discussing other common causes of vape pen blinking problems.
2. Overheating and Safety Protections
Modern vape pens have built-in safety features to prevent overheating. These mechanisms are designed to protect both the device and the user, making vaping safer. When the vape pen detects unusually high temperatures, it may stop working and show blinking lights as a warning.
Primary Factors Contributing to Overheating:
- Continuous Usage: Long vaping sessions without breaks can cause the device to overheat.
- Environmental Conditions: Using the vape pen in hot places can make it heat up even more.
- Internal Issues: Sometimes, problems inside the device can cause sudden increases in temperature.
Tips for Preventing Overheating:
- Keep the Vape Pen Cool: Store your vape pen in a cool place when you're not using it.
- Take Breaks: Avoid vaping for long periods without giving your device time to cool down.
- Monitor Usage: Pay attention to how often you use your vape pen, especially when it's hot outside.
Steps to Address Blinking Due to Overheating:
- Turn Off the Device: Let it cool down for a few minutes before trying to use it again.
- Reset Temperature Sensors: Some models might need you to reset their temperature sensors by turning off and on the device.
- Check for Firmware Updates: Follow the manufacturer's instructions to see if there are any firmware updates available that could improve the device's performance and safety features.
By keeping these tips in mind and understanding how these safety features work, you can prevent overheating problems and ensure that your vape pen works well. This knowledge also helps you make better choices about when and how often you use your device, leading to a more enjoyable vaping experience overall.
3. Connection Issues: The Importance of a Solid Link Between Components
Vape pen blinking can often be attributed to connection problems within the device. Proper connections between the battery, atomizer, and other components are crucial for smooth operation. Loose or dirty contacts can lead to intermittent blinking issues.
Several primary factors contribute to these connection problems:
- Loose Contacts: Over time, the connections between the battery and the atomizer can become loose. This can cause inconsistent power delivery, leading to blinking lights.
- Dirty Contacts: Residue from e-liquids or general dirt buildup can interfere with the electrical connection. This can result in insufficient power being delivered to the heating element.
To troubleshoot these issues, consider the following steps:
- Disassemble Your Vape Pen: Carefully separate the battery from the atomizer.
- Inspect Contact Points: Look for any visible dirt or residue on both the battery and atomizer contacts.
- Clean Contacts: Use a cotton swab dipped in isopropyl alcohol to clean the contact points thoroughly. Ensure that they are completely dry before reassembling.
- Check Fit: Reattach the components securely, making sure there is no wobble or looseness.
Regular maintenance of your vape pen's connections helps prevent blinking issues due to poor contact, ensuring a more reliable vaping experience.
Troubleshooting Steps for Fixing Connection Issues
When your vape pen is blinking, a common culprit can be connection issues. Addressing these problems can often resolve the blinking and get your device working smoothly again. Here’s how you can troubleshoot:
- Inspect and Clean the Contacts: Ensure that the battery and atomizer contact points are clean. Dirt or residue can disrupt the connection. Use a cotton swab dipped in isopropyl alcohol to gently clean these areas.
Tip: Make sure both the battery terminal and the base of the atomizer are completely dry before reassembling.
- Check for Loose Connections: Sometimes, components may not be tightly screwed together. Ensure that the battery is securely attached to the atomizer. A loose fit can lead to inconsistent power delivery, causing blinking lights.
- Examine for Damaged Components: Look out for any signs of wear and tear on the threads of your vape pen. Damaged threads can hinder proper connections between parts, leading to operational issues.
- Test with Different Components: If possible, try using a different battery or atomizer. This can help pinpoint whether the problem lies with a specific component or connection.
By following these steps, you can address common factors contributing to vape pen blinking due to connection issues.
4. Faulty Coil or Atomizer
A malfunctioning coil or atomizer is a common reason why your vape pen may be blinking. When these parts aren't functioning properly, they can disrupt the vaping process and cause the device to flash warning lights.
There are several factors that can contribute to a faulty coil or atomizer:
- Burnt-out Coil: Over time, the coil in your vape pen can burn out, especially if you've been using it a lot. This leads to less vapor being produced and blinking lights as a way for the device to indicate that something is wrong.
- Improper Wicking: Good wicking is essential for effective vaping. If the wick inside your atomizer isn't soaked enough with e-liquid, it can result in dry hits and make the device blink. Making sure that your wick is properly soaked can help prevent this problem.
- Worn-out Heating Elements: The heating elements in the atomizer break down over time from regular use. When these elements are worn out, they can't heat up the e-liquid properly, causing blinking lights as a sign of an issue.
How to Fix It
Here's what you can do to address these problems:
- Inspect the Coil: Take out the coil from your vape pen and examine it closely. If you see any signs of burning or damage, it's time to get a new one.
- Check Wicking: Make sure that your wick is fully saturated with e-liquid before using your vape pen. If you're using a new coil, you might need to soak it in e-liquid for a few minutes before putting it in.
- Replace Old Components: If your heating elements look worn out, replace them with new ones that are compatible with your vape pen model.
By being aware of these common causes related to coils and atomizers, you can prevent many instances of vape pen blinking problems and enjoy a smoother vaping experience.
Checking and Cleaning the Coil/Atomizer Components
When your vape pen is blinking, inspecting the coil and atomizer is essential. Several primary factors can contribute to this issue, including coil damage or residue build-up in the atomizer tank.
Inspecting the Coil:
- Signs of Damage or Discoloration: Coils can burn out or become worn over time. Look for any signs of discoloration or physical damage. If you notice any irregularities, replacing the coil with a new one according to the manufacturer's instructions is advisable.
- Improper Wicking: Ensure that the wick inside the coil is not damaged. Improper wicking can lead to dry hits and cause your vape pen to blink.
Cleaning the Atomizer Tank:
- Proper E-liquid Flow: A dirty atomizer tank can obstruct e-liquid flow, leading to potential issues with the coil. To clean:
- Rinse the tank with warm water.
- Let it dry thoroughly before reassembling.
Steps for Cleaning:
- Disassemble your vape pen as per the manufacturer's guidelines.
- Remove the atomizer tank and rinse it under warm water.
- Use a cotton swab dipped in isopropyl alcohol to clean hard-to-reach areas.
- Allow all components to dry completely before putting them back together.
Maintaining a clean and functional coil/atomizer setup ensures smooth operation and reduces blinking issues, empowering you to enjoy a consistent vaping experience.
Part 2: Troubleshooting Guide for Vape Pen Blinking Issues

1. Check the Battery Status
Having a fully charged battery is crucial for getting the best performance out of your vape pen. If the battery is running low, it might not be able to heat up the e-liquid properly, resulting in blinking lights but no vapor.
- Battery Depletion: If your vape pen is lighting up but not producing any vapor when you take a hit, it's probably because the battery is low. The blinking light is a sign that you need to charge your device.
- How to Check Battery Status: Most vape pens have a feature that lets you check the battery level. You can usually do this by pressing certain buttons in a specific sequence. Look up the instructions in your device's manual to find out how to do it. For example, some models require you to press the fire button three times quickly.
- Charging Your Device: Once you know that your battery is low, use the USB cable or charger that came with your vape pen to charge it. Make sure you're using the right charging equipment to avoid damaging the battery.
2. Inspect Charging Connections
Sometimes, blinking issues can be caused by problems with the connections between your vape pen and the charger. Even if your battery seems fine, if there's not a good connection, it won't charge correctly.
- Try a Different Cable or Port: Switching to a different USB cable or charging port could solve the problem. Sometimes, it's not the battery itself that's causing the issue but rather a faulty connection.
- Clean Your Connections: Dirt and residue can get in the way of proper charging. Take a cotton swab and dip it in isopropyl alcohol, then use it to clean both the charger and the contact points on your vape pen.
3. Verify Battery Compatibility
It's important to note that not all batteries are compatible with every vape pen model. Using a battery that's not recommended for your device can trigger safety features, which in turn cause the blinking lights.
- Follow the Manufacturer's Guidelines: Always use the batteries that are specifically recommended by the manufacturer of your vape pen. This ensures that the voltage and current requirements are being met.
- Check for Physical Damage: Take a close look at your batteries and see if there are any signs of wear and tear. If you spot any damage, it's best to replace them right away to avoid any potential issues or dangers.
4. Resetting the Device
Sometimes, a simple reset is all it takes to fix the blinking problem with your vape pen.
- Power Cycle: Turn off your vape pen completely, wait for a couple of minutes, and then turn it back on. This can reset the internal sensors and clear up any minor issues.
- Factory Reset: Certain advanced models have a factory reset option available. Refer to your user manual to find out how you can perform this action if needed.
5. Consult Customer Support
If you've tried all of these steps and your vape pen is still flashing and not working properly, it might be time to get in touch with customer support.
- Check Your Warranty: Find out if your device is still covered under warranty. Many manufacturers offer support services or replacements for defective units.
- Get Professional Help: Sometimes, there might be underlying problems that require expert attention. Contacting customer support will allow you to get further assistance with troubleshooting or possibly arrange for your device to be inspected.
By following these steps, you have a good chance of figuring out why your vape pen is blinking but not functioning correctly. Making sure that you take care of your battery and regularly check the connections can go a long way in improving your overall vaping experience and reducing the frequency of these blinking issues.
2. Examine the Atomizer and Coil Resistance
The atomizer is a crucial component of your vape pen, responsible for converting e-liquid into vapor. When there's an issue with the atomizer, it can cause the device to malfunction, often indicated by blinking lights.
Common Atomizer Issues:
- A burnt-out coil
- Improper wicking
- Worn-out heating elements
These issues can disrupt the vaping process, making your vape pen blink but not produce any vapor.
Steps to Troubleshoot Atomizer Problems:
1. Check for Burnt Coils:
- Remove the atomizer from the vape pen.
- Inspect the coil for any signs of burning or damage.
- Replace the coil if necessary.
2. Ensure Proper Wicking:
- Make sure the wick is properly saturated with e-liquid.
- Adjust or replace if it's too dry.
3. Clean Heating Elements:
- Disassemble the atomizer.
- Clean all parts with a cotton swab dipped in isopropyl alcohol.
- Reassemble and test the device.
Incorrect coil resistance settings can also lead to compatibility issues, causing your vape pen to flash and not work. Each device has a specific resistance range it supports, and using a coil outside this range can trigger blinking lights as a warning.
How to Check Coil Resistance:
1. Identify Supported Resistance Range:
- Refer to your vape pen’s user manual or manufacturer’s website.
2. Measure Coil Resistance:
- Use an ohm meter to check the resistance of your coil.
3. Adjust Settings:
- If your device allows, adjust the settings to match the required resistance range.
- Alternatively, replace the coil with one that falls within the supported range.
By following these steps, you can diagnose and resolve common issues related to atomizers and coil resistance that often cause vape pens to blink without producing vapor. This ensures a smoother vaping experience and helps maintain optimal performance of your device.
Dealing with a Burnt Coil Situation
A burnt coil is a common cause when your vape pen is not hitting but lighting up. This issue often results in your device flashing and not working properly. To tackle this, follow these steps:
1. Identify the Burnt Coil:
- If you notice a burnt taste or smell, it's likely that the coil needs attention.
- Inspect the coil for any visible signs of damage or residue build-up.
2. Cleaning the Coil:
- Dry-Burning Method: Gently dry-burn the coil to remove gunk or residue. Activate the vape pen for a few seconds without inhaling, allowing the residue to burn off.
- Caution: Use this method sparingly to prevent further damage to the coil structure.
3. Replacing the Coil:
- If cleaning doesn't resolve the issue, replace the coil with a new one of the same type.
- Consult your vape pen's user manual for instructions on how to properly install a new coil.
4. Preventive Measures:
- Regularly clean your tank and coils to avoid buildup.
- Use e-liquids recommended by your device manufacturer to ensure compatibility.
Common issues like battery problems or connection issues can also lead to blinking lights, so it's crucial to address each component systematically. Dive deeper into other sections of this guide to fully troubleshoot your device.
3. Explore Safety Features and Refer to the User Manual
Understanding the safety features of your vape pen can help you troubleshoot blinking issues more effectively. Modern vape pens are equipped with various safety mechanisms designed to protect both the user and the device. These features can include:
- Overheat protection: Shuts down the device if it becomes too hot.
- Short-circuit protection: Prevents damage if a short circuit is detected.
- Low battery warning: Alerts you when the battery needs to be charged.
To fully grasp these features, always refer to the user manual that comes with your vape pen. The manual provides detailed information about how your specific model operates, including what different blinking patterns signify. For example, a continuous blink might indicate a low battery, while rapid blinking could signal a short circuit or another issue.
Steps for exploring your vape pen’s safety features:
- Locate Your User Manual: This is usually included in the packaging or available on the manufacturer's website.
- Identify Blinking Patterns: Check the manual for a guide on what each blinking pattern means.
- Understand Safety Protocols: Familiarize yourself with built-in protections like overheat and short-circuit safeguards.
If you encounter issues like vape pen not hitting but lighting up or vape flashing and not working, consult these sections in your user manual first. This can save time and potentially prevent unnecessary replacements or repairs.
Familiarizing yourself with these details ensures that you're well-prepared to diagnose and resolve common battery issues and other problems that may arise. By leveraging this knowledge, you take control of your vaping experience, making it safer and more enjoyable.
4. Addressing Other Potential Causes
If your vape pen is not hitting but lighting up, or if you notice it flashing and not working, there might be other reasons behind it. Here are some steps you can take to troubleshoot and fix these issues:
Connection Issues
A strong connection between different parts of your vape pen is essential for it to work correctly. Loose or dirty contacts are often the culprit behind blinking.
- Clean Contact Points: Use a cotton swab dipped in isopropyl alcohol to clean the contact points between the battery and atomizer. Dirt or residue can disrupt the electrical flow.
- Check Component Fit: Make sure all components, such as the tank and atomizer, are properly installed. They should fit securely without being too tight.
Activation Button Issues
A stuck or faulty activation button can cause blinking and interfere with your vaping sessions.
- Inspect the Button: Press the activation button multiple times to check if it's sticky or unresponsive. If it is, cleaning might help.
- Clean Around the Button: Use a small brush or cloth to remove any debris around the button that could be causing it to stick.
- Test Functionality: After cleaning, try pressing the button again to see if the issue persists.
Battery Issues
Even after charging your battery, there could still be underlying problems affecting its performance.
- Try Different Charging Equipment: Use another charging cable or port to charge your battery. Sometimes, faulty charging accessories can prevent a full charge.
- Consider Battery Replacement: If your battery is old or has been heavily used, it might be time for a new one. Over time, batteries lose their ability to hold a charge efficiently.
E-Liquid Levels
Low e-liquid levels can also cause blinking lights on your vape pen.
- Refill Your Tank: Make sure your tank has enough e-liquid. A low level can result in dry hits and blinking alerts from the device.
- Check for Leaks: Examine your tank for any leaks that could be causing e-liquid to deplete faster than usual.
By addressing these potential causes, you can solve many common problems that lead to vape pen blinking. Each step covers a different aspect of your device's performance, ensuring you have the best vaping experience possible.
Part 3: Preventing Future Vape Pen Blinking Issues through Proper Maintenance
1. Regular Cleaning of the Tank and Connections
Maintaining your vape pen is crucial for maximizing your vaping experience and preventing blinking issues. A key aspect of this maintenance involves regular cleaning of both the tank and connections.
Steps to Clean Your Vape Pen Tank:
- Disassemble the Tank:Carefully take apart your vape pen, separating the tank from the battery and other components.
- Rinse with Warm Water:Rinse each part of the tank under warm water to remove any remaining e-liquid.
- Use Mild Dish Soap:Fill a bowl with warm water and a few drops of mild dish soap.
- Place the tank components in the soapy water and let them soak for a few minutes.
- Scrub Gently:Use a soft brush or cloth to gently scrub the inside and outside of the tank components.
- Rinse Thoroughly:Rinse all parts under warm water again to ensure that all soap residues are removed.
- Dry Completely:Allow all components to air dry completely before reassembling your vape pen.
Cleaning Connections:
Connections between different parts of your vape pen are critical for its proper function. Dirty or loose connections can lead to blinking issues.
- Cotton Swab with Isopropyl Alcohol:Dip a cotton swab in isopropyl alcohol.
- Gently clean the contact points on both the battery and atomizer to remove any dirt or residue.
- Inspect for Damage:While cleaning, inspect these connections for signs of wear or damage that might affect performance.
Regular maintenance ensures your device remains in optimal condition, reducing common problems such as blinking due to connectivity issues or residue buildup.
2. Periodic Battery Care
Battery health directly impacts your vape pen’s performance. Regular care can prevent blinking problems related to battery issues.
Tips for Maintaining Battery Health:
- Regular Charging:Charge your vape pen regularly but avoid overcharging as it can diminish battery life.
- Avoid Extreme Temperatures:Keep your battery away from extreme heat or cold, which can affect its efficiency.
- Check Charging Equipment:Use only recommended charging cables and ports. Faulty equipment can lead to improper charging.
3. Monitoring E-liquid Levels
Running low on e-liquid can cause your vape pen to blink due to insufficient juice for proper vaporization.
Steps to Monitor E-liquid Levels:
- Frequent Checks:Regularly check e-liquid levels in your tank.
- Refill Promptly:Refill when levels are low but avoid overfilling, which can lead to leaks and performance issues.
- Use Compatible E-liquids:Ensure you are using e-liquids compatible with your device for optimal performance.
4. Routine Coil Replacement
Coils wear out over time, causing blinking issues due to poor heating element performance.
Guide to Coil Replacement:
- Identify Wear Signs:Look out for burnt taste or reduced vapor production, indicating coil replacement is needed.
- Purchase Quality Coils:Use coils recommended by the manufacturer for best results.
- Replace Regularly:Follow manufacturer guidelines on how frequently coils should be replaced based on usage patterns.
Regular maintenance not only prevents blinking issues but also extends the lifespan of your vape pen, ensuring a smoother vaping experience each time you use it.
2. Avoiding Common User Errors
To have a smooth vaping experience with fewer blinking problems, it's important to avoid making common mistakes as a user. Taking good care of your vape device and doing regular maintenance can make a big difference in how well it performs. Here are some typical errors that vapers often make:
- Chain Vaping:
- Taking multiple puffs in quick succession can cause the coil to overheat. When the coil gets too hot, it may trigger the vape pen’s safety features, leading to blinking lights.
- To prevent this, take breaks between puffs to allow the coil to cool down.
- Inhaling Too Forcefully:
- Inhaling too hard can create a vacuum effect, disrupting the e-liquid flow and causing dry hits. This can result in blinking issues as the device struggles to vaporize insufficiently wicked e-liquid.
- Instead, aim for smooth and steady inhales, ensuring a consistent flow of e-liquid to the coil.
- Blocking Airflow Vents:
- Covering or obstructing the airflow vents can lead to improper vapor production and overheating. The device might blink as it tries to compensate for restricted airflow.
- Make sure your fingers or other objects do not block these vents during use.
Properly maintaining your vape device is crucial if you want to enjoy vaping without any hiccups. Clean your tank regularly and make sure all the parts are securely connected in your vape pen. By avoiding these common mistakes, you'll lower the chances of experiencing blinking issues and have a more enjoyable vaping session.
Taking care of your vape device not only helps you avoid these mistakes but also makes it last longer and perform better overall.
Conclusion
Understanding why your vape pen is blinking can save you from a lot of frustration. The common culprits include:
- Low battery power
- Overheating and safety protections
- Connection issues between components
- Faulty coil or atomizer
Addressing these issues promptly ensures a smooth vaping experience. Regularly checking and charging your battery, maintaining proper connections, and ensuring your coil or atomizer is in good condition are key steps.
Your experiences can help others too. Share any additional tips or personal troubleshooting methods for dealing with vape pen blinking issues in the comments section below. Engaging in this community can provide support and enhance everyone's vaping journey.